On iPhone, when you email a picture, a pop up will ask if you want to send that picture as Small, Medium, Large or the Original size. All these different image sizes have different sizes (kilobytes to megabytes) depending upon the selected option.
Resize image when emailing from iPad
You can follow the below procedure to resize image when emailing from iPad. I have picked up an existing email and forward it for demonstration purposes only.
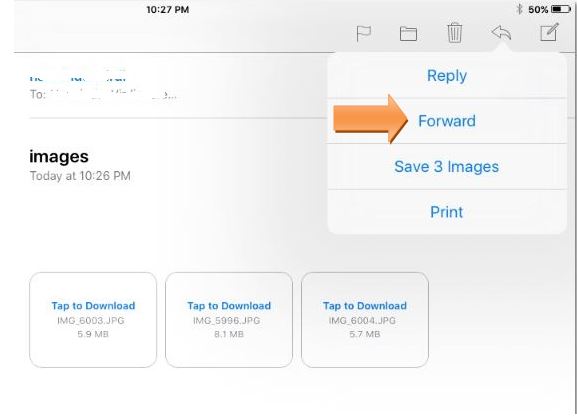
- Open the email program, select the email and select Forward
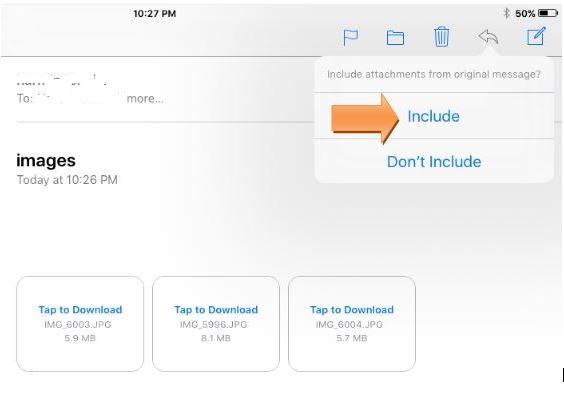
- Select Include “Include Attachments From Original Message” popup
- Fill in To: and Subject fields
On Cc/Bcc field, look to the right where it says image: 14.6MB (the size will vary depending on the attached image). Tap the Cc/Bcc line to expand it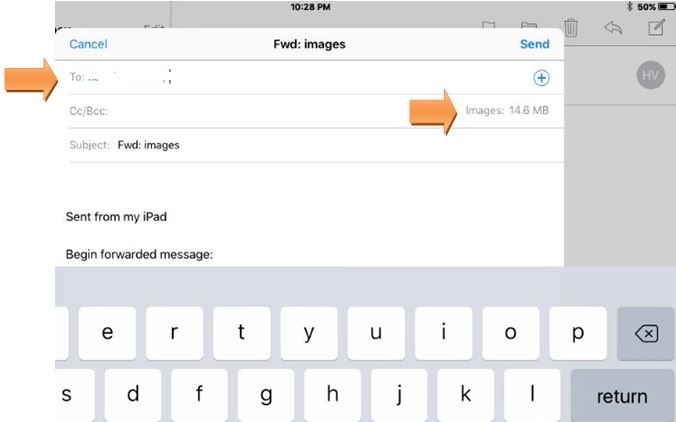
- Now you will see Image Size Options: Small, Medium, Large and Actual Size. Tap one of the buttons to shrink the photo size. In the example I have selected Medium
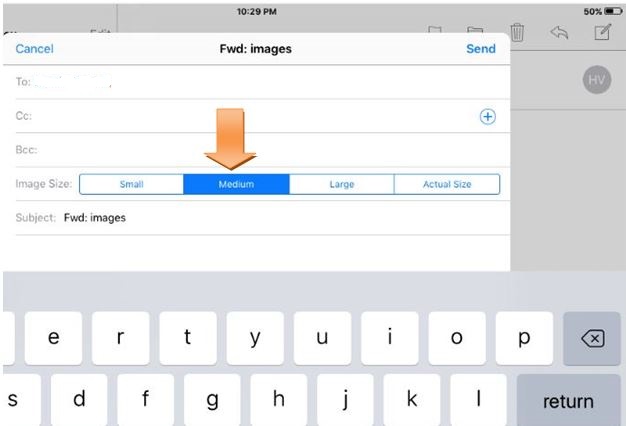
- Now go ahead and tap Send button.
iPad Error Message:Cannot Send Mail-The message was rejected by the server
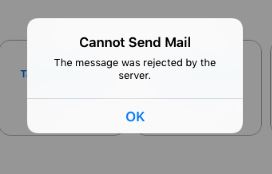
If you are trying to emailing pictures as attachment or forwarding an email with attachments and you get an error message “Cannot send Mail: The message was rejected by the server” then most likely the issue is with the attachment size.
You can simply apply the above mentioned procedure to resize the attached picture and you will not see the above error message. The good thing is the selected image size stays while you send the other emails.
Thank you Amit.
nice article
Thank you.