Google Analytics, by far, is the most used web traffic reporting tool. It is, as the name suggests, a product of Google and is available for free for the most of the users and a Premium version (the paid one) for enterprise users. Google Analytics has so many tools offered to its users to track website traffic and since its launch in 2005, it is still evolving and is regularly coming up with new services. The most recent being the real-time analytics in which you can see the real-time web traffic on your website.
In this post, we are going to talk about how to setup Google Analytics account.
To begin with, you need to have an account with Google.
- Go to http://www.google.com/analytics and log in with your google account credentials.
- There you are, you are inside Google Analytics now, but you need to set it up for your website. You should see something like this:
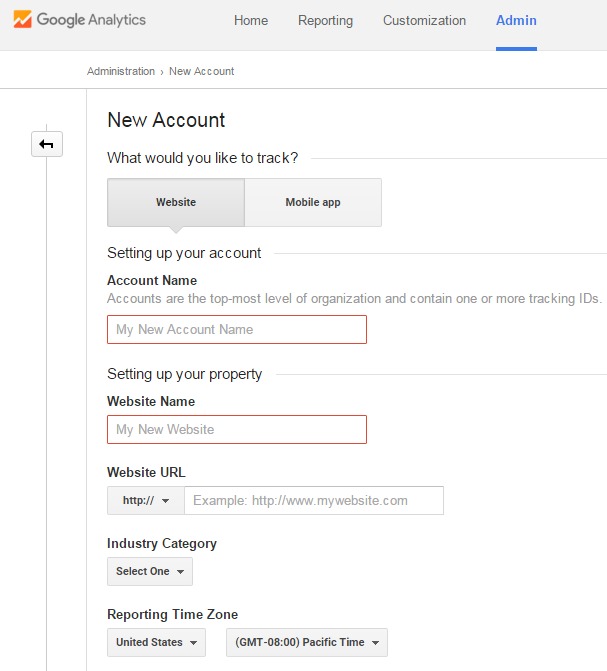 Fill in the required details in the empty input boxes. In Account Name and Website Name, fill in the information you’d like for your account name on Google Analytics. The website name can be anything but to make it more relevant, name it as the name of the website. Keep it in mind that you can have multiple websites (properties) under one account in Google Analytics, so name it accordingly. Website URL input box should have URL of your website mentioned carefully as in the example. Select the Industry Category and Reporting Time Zone accordingly and click Get Tracking ID.
 - Select the Country in the popup window of Google Analytics terms of service agreement. Read and accept the agreement.
- The following window will appear on the screen with your website Tracking ID. This tracking ID is unique for every property. This window also consists of website tracking code which you’d have to paste into every webpage you want to track. You can do this by inserting this code in <head> tag of the web pages. This piece of code connects your webpages to your Google Analytics account. If you are not seeing any traffic report from a webpage on your website, you may want to check if that page has this code inserted in its <head></head> tags.
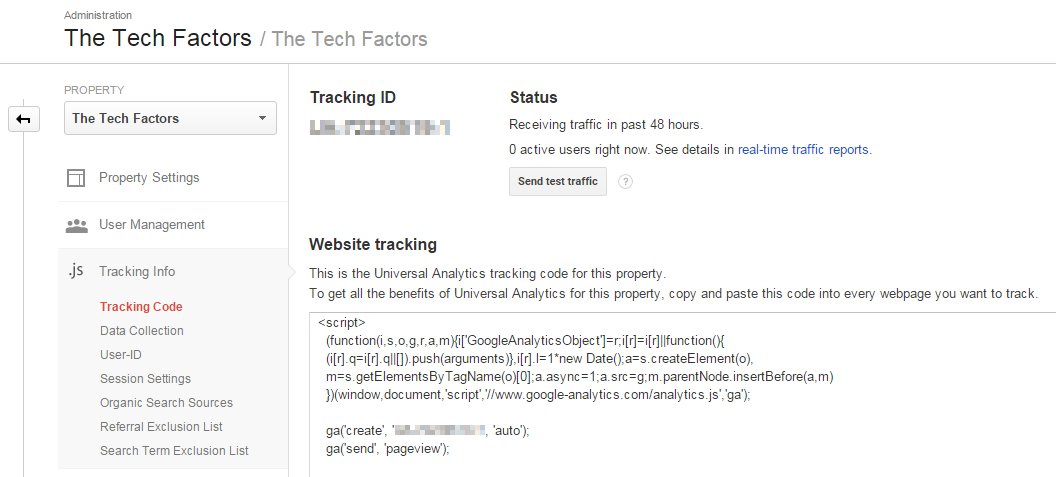
- You are all done in setting up Google Analytics account. Once you follow all the above steps, you’ll be able to see your web traffic in real-time in a moment but it does take around 2-3 hours to update the traffic report.
Filtering your own visits to the website
In case you do not wish to track your own visits or pageviews on your website, Google Analytics’ Filters would do that for you.
- Go to Filters in your Account’s view section.
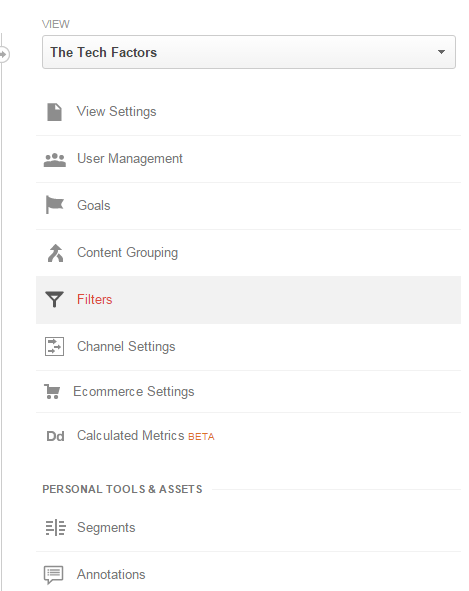
- Click +Add Filter and enter Filter Name of your choice. I have named it as IP Address so that I can distinguish between the different filters I have applied to my property. Choose the following options from each drop-down:
Select Filter Type : Exclude
Select source of destination : traffic from the IP addresses
Select expression : that are equal to.
In the IP address input box, fill in your IP address. If you are unsure about your IP, you can find it here: https://www.whatismyip.com/. Click Save.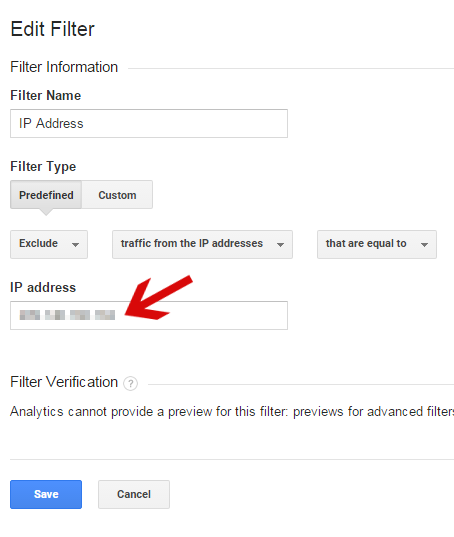
Filtering 2 or more IP Addresses in Google Analytics
In case you want to filter out 2 or more IP addresses, the process is somewhat different.
- Instead of Predefined, select Custom under Filter Type.
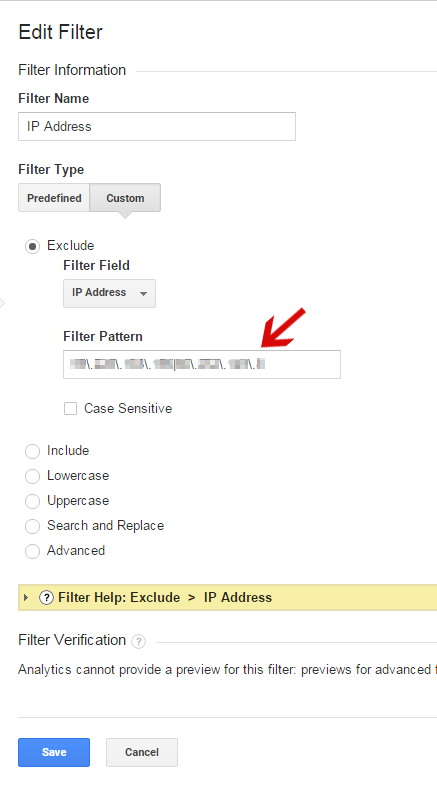
- Choose Exclude and under Filter Field, select IP Address.
- In Filter Pattern input box, write both the IP addresses in the following regular expression pattern: 192\.168\.100\.1|192\.168\.100\.11 (these IP addresses are just used for this example, please use your appropriate IP addresses public or internal IP). To know more about regular expressions, you can visit this link from Google.
- Click Save.
You’ll no longer be seeing the traffic from both these IP Addresses as they are excluded by Filters in Google Analytics report.